Twenty-Six

Yesterday I turned twenty-six years old. My day started out pretty rough–thanks 6am garbage truck who wakes my son every Friday morning!–but I ended up having a great day. We had some wonderful friends take Evan for the evening and Brinton and I were able to go out to dinner and just enjoy each others company. After dinner we caught the tail end of the Waikiki fireworks from the top of the Ala Moana Center and then walked around the mall for a bit picking up my free birthday perks from a few makeup stores. I also stopped to buy an adorable Curious George stuffed animal for Evan. I know it was my birthday but I knew he would love it so much!

6tag_300115-230614

Later we went to buy Brinton a suit for his sister’s wedding and then went out for fro-yo at Menchies. It was such a good evening and a much needed date night. We haven’t been out just the two of us in quite a while and it was so nice to be able to go out without worrying about if Evan was getting antsy or not.

6tag_300115-231316

Brinton also surprised me with a beautiful necklace from Wrenn Jewelry. Their jewelry is just so stunning–I want everything! The necklace he chose for me is absolutely gorgeous. I’m wearing it in the picture above, but I’ll post a better picture on the blog and on Instagram next week when I’m actually dressed. It’s pjs Saturday around here today…no shame, y’all.

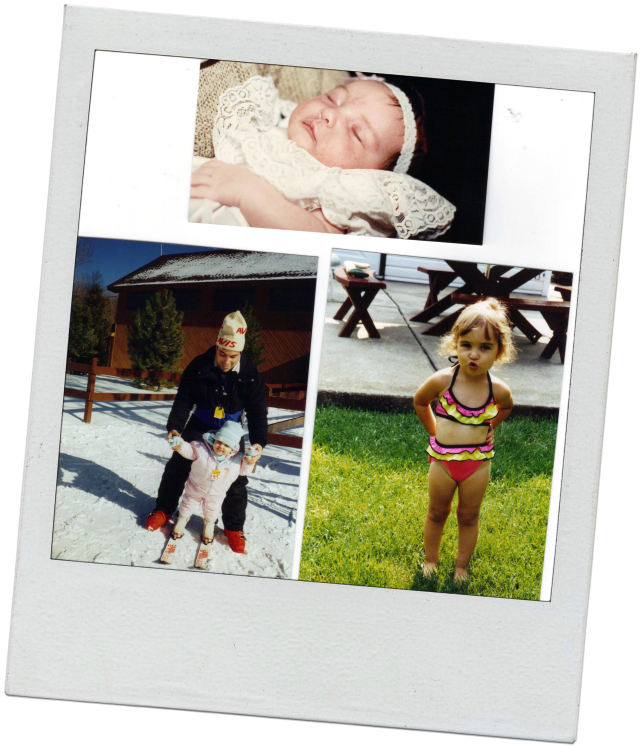
I asked my mom to send me a few pictures of me when I was little. Here’s a few good ones of baby/toddler Maria. Ha, you can see I’ve always had quite a little personality.

untitled

I hope you all are having a fantastic weekend. Thanks to everyone who called or messaged me with birthday wishes! I appreciate you all!

Nine Alternatives to Birthday Cake

My 26th birthday is this week, and it has gotten me thinking about how I want to celebrate! I always love the idea of cake, but I’m actually not that big of a fan of eating it. I do get a good cake craving every now and then, but in general it usually isn’t my first pick. I’ve also been trying to make healthier choices this year, so I thought it might be fun to brainstorm some birthday cake alternatives and share them with you all! Don’t get me wrong…not all of these choices are going to be healthier options…but some are!

Most of these pictures are from Pinterest or Instagram, and I’ll link to the website that they came from if they are not my own. I would have loved to make everything myself and take my own pictures but I didn’t have the time to do that (plus if I made and subsequently ate all of these things, it definitely wouldn’t be healthier than birthday cake!)

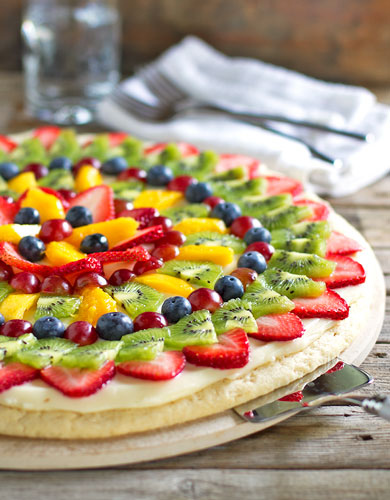
Fruit Pizza

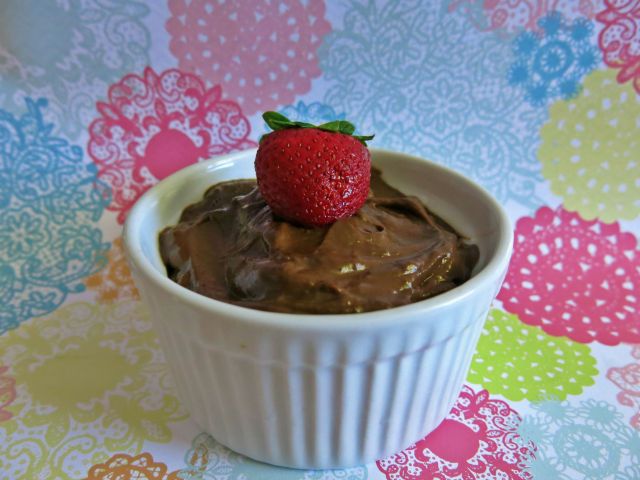
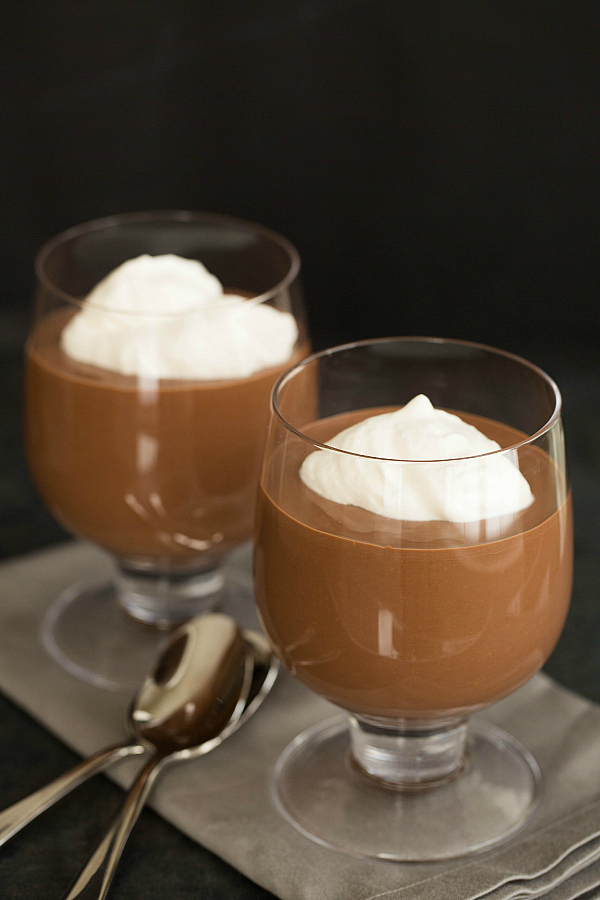
Chocolate Avocado Mousse

Chocolate Avocado Mousse

via me, Maria Simply Smiling (recipe coming soon!)

Chocolate Covered Strawberries

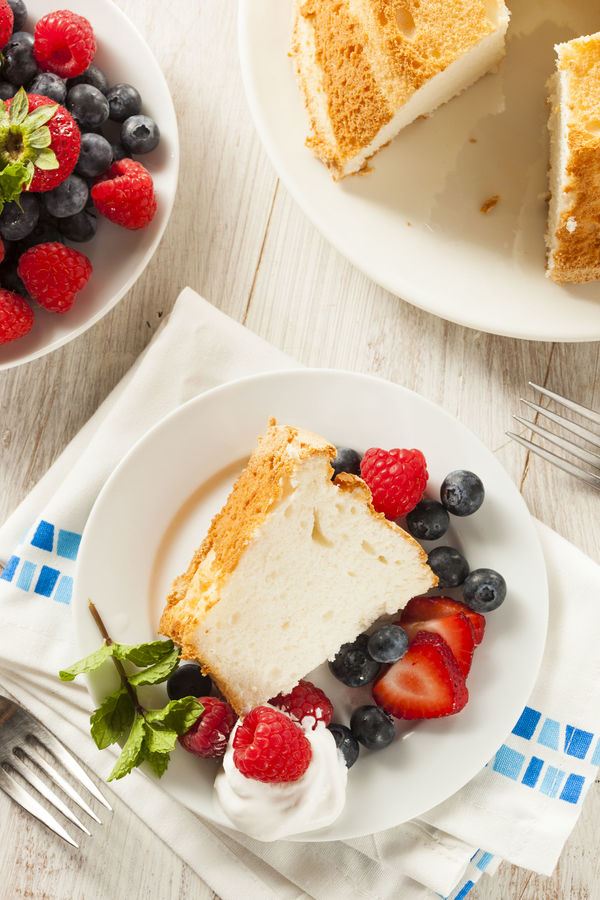
Angel Food Cake with Fruit and Fresh Whipped Cream

Pudding Cups

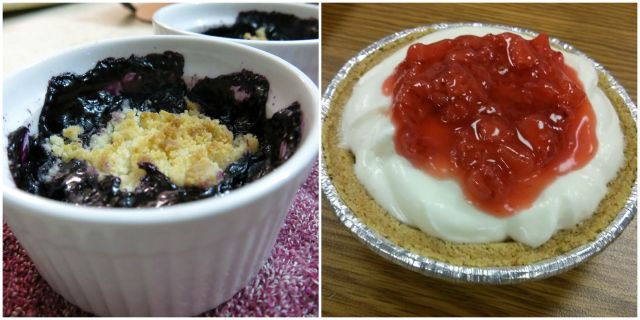
Mini Pies, Cheesecakes, or Crumbles

via me, Maria Simply Smiling (recipes here and here)

via me, Maria Simply Smiling (recipes here and here)

Ice Cream Cone Cupcakes

Ice Cream in a Cookie Bowl

Cinnamon Rolls

via me, Maria Simply Smiling (recipe coming soon!)

via me, Maria Simply Smiling (recipe coming soon!)

I hope this gives you all a few new ideas for ways to celebrate your birthday other than with cake! Do you have anything to add to the list? I haven’t decided what I’m going to celebrate my birthday with yet, so let me know in the comments!

Linking up with Linking up with Tuesday’s Table and Lou Lou Girls!

How to be a More Productive Planner

I struggled with starting this post today. Originally, my intentions were to write about why planning is important, but as I sat down to write I found that I didn’t have as much to say as I thought I did. Instead, the post started to steer in the direction of how to be a more productive planner and why planning is helpful on a day to day basis.

Here are a few tips on how to plan more productively!

Make the time to plan your week // Take an hour or so at the beginning of your week and sit down with your calendar, schedule, to-do list, etc., and plan things out. You are more likely to be successful and accomplish more if you assign specific tasks to specific days. I personally find that I have a greater sense of peace and control when I plan my whole week out in advance. There are less surprise things to do that sneak up on me and I feel more calm starting my week off in order. Every morning, take a quick look at the day you have planned to see if you need to make any changes, and adjust accordingly.

Menu plan // This can be a cumbersome chore for me, but my week runs so much more smoothly when I have an idea of what we are going to do for dinner every night. To get started menu planning, brainstorm a list of your favorite meals so you have a “bank of options,” so to speak. You can then plan out your meals accordingly. Save time consuming recipes for nights when you know you’ll be able to cook, and either plan freezer meals or take-out for nights when you won’t have time to cook. Remember that your meal plan doesn’t have to be set in stone! Every now and then I will look at our menu for the evening and not feel like eating what we planned, but because we have a whole week of meals planned and shopped for, I can just swap days and still be ahead of the game!

Find a system that works for you // For me, it’s color coding. Planner Color CodeI assign a specific color to different aspects of my life so that when I write everything out in my planner I can quickly see what it is I have to do that day, or what my overall schedule for the week looks like. I personally find this to be really helpful because I don’t need to necessarily look at each and every thing that is happening that day, but just by glancing I’ll know that I have two blog posts to write, an appointment in the morning, and a meeting for church in the evening. If you are interested, here is a picture of the color code I am currently using:

Don’t over-plan // This one is really important. I know many of us have a ton of commitments, appointments, and events we need to keep track of, but if you spread yourself too thin eventually it will catch up with you. If you over schedule yourself (or your kids!), either a) you wont be able to keep up or participate fully in everything you are supposed to do, b) you will accidentally forget about things you are supposed to do, or c) you will burn out from trying to do everything. It is important to learn how to say no to people or commitments when you are becoming overbooked. It’s also important to learn how to prioritize the things you decide to stay committed to. It may be hard to eliminate things from your schedule at first, but as you learn what your priorities really are and how much you can handle, you will feel less stressed by keeping it simple (or at least, a little more simple than before).

Be flexible // Occasionally you may not get to everything you planned to do–life can be unpredictable and sometimes it just doesn’t happen! Allow yourself some wiggle room and be flexible with your schedule. Make sure not to schedule two things so closely back to back that you don’t give yourself time to travel, or a buffer in case your first commitment runs late. If you don’t accomplish all you want to in one day, take a few minutes at the end of your day to re-evaluate your plan and see where you can re-assign some tasks. That might mean you cut some things out completely, and that’s okay! Don’t beat yourself up for needing to change the plan.

Celebrate your accomplishments // Particularly in regards to goal setting, make sure to celebrate what you have achieved! Breaking a larger goal down into “bite-sized” manageable pieces is a great way to make the goal more achievable, and it also makes it way easier to plan for. When you manage to plan out the steps to accomplishing your goal you are already well on your way to being successful, so be sure to celebrate when you actually do complete one of those tasks! A simple pat on the back will help you to stay motivated, and if you wrote it down, crossing it off will make you feel great and give you a visual reminder of what you have achieved.

Buy a planner that you love to use // I invested in an Erin Condren life planner last year, and I really feel like it has made a huge difference in how I plan and my productivity level. I love how pretty and well organized it is, and it makes me excited to sit down with my colored pens and washi-tape and get to planning. If you find a planner you love, it will help you love to plan! This post is not sponsored in any way by Erin Condren. I just found something that works for me, so I wanted to share it with you. You can check out my most recent YouTube video all about my planner and why I love it below.

I hope some of these tips were helpful for you! Tell me, what are some things you do to be a more productive planner? I’m always looking for new ideas and tips!

Linking up with the Lou Lou Girls for their Fabulous Party and Worthwhile Wednesday!

The Silver Lining

Last week was so busy that I completely missed my silver lining post. Even though it was a crazy day today too and it’s super late, I didn’t want a second week to go by without reflecting on the positive things that happened! That being said, I’m sleepy, so let’s keep this short, shall we?

Silver Lining Header

Yoga // This last week has been a difficult week, workout wise. My wrist has really been bothering me which has made it hard to keep up with the Jillian Michaels Ripped in 30 program that I’ve been doing. On the bright side, I’ve been switching gears and doing yoga instead to allow my body to rest and avoid injury, and I feel like I’ve made some real progress with the flexibility of my hips! So, that’s always nice!

Girl Scout Cookies // My mom sent us a care package with our three favorite girl scout cookies: thin mints, tagalongs, and samoas. I’ve been doing better not munching on sweets when I’ve been hungry these past few weeks, but with these in the house, you can bet that will go right out the window. But the silver lining is…I have girl scout cookies!!! Haha, it’s both a blessing and a curse, y’all.

Roaches // Well, it’s Hawaii, so naturally we have roaches we have to deal with. ’tis the season (aka always…thanks Hawaii) and I hate it. What could possibly be the silver lining here? We are going to have an exterminator come, but in order to have him treat our apartment properly we need to completely clean out a few areas of our apartment which means I get to embrace my type A personality and go on a de-cluttering and organizing spree! (Um, side note: just to clarify…we aren’t dirty people or anything like that, and by de-cluttering I mean getting rid of extra kitchen gadgets we don’t use anymore, old cookbooks, etc. We have roaches because it’s Hawaii, not because we are gross!)

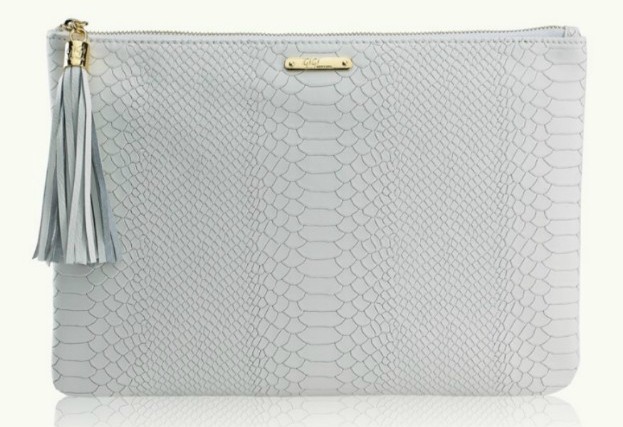
GiGi New York // So I just instagrammed this, but I am super bummed about missing out on the oh so amazing Uber clutch in white. I was going to use some birthday money to treat myself to something really nice that I never would have otherwise…but before I could checkout they were gone. I don’t know what my silver lining is, haha. I saved money! That’s good, right? Gigi New York I know there is no way you would ever see this, but if you wanted to give out the most amazing birthday surprise ever, my initials are MAJ and you would make me oh so happy! Haha. Worth a shot, right?

GiGi New York clutch

City Noise // As you may or may not have seen in two of my recent posts, I have started delving into the world of YouTube. It has been so hard to find time to film with a toddler running around though that I haven’t been quite as consistent as I would like with posting videos. I filmed another one today while my little was napping, but it took like three times longer than it should have because it is so loud here and the background city noise was ridiculous! On the bright side, I’m not letting that stop me and I am pretty determined to find a way to make it work. Also, I promised myself I would push myself outside of my comfort zone this year, and YouTube definitely falls into that category! So all in all, even though it’s challenging to make the videos and I am nervous to post them, it’s a good experience for me to go through.

Screenshot 2015-01-23 at 10.44.30 PM

Okay, that’s it friends! I’ll be back tomorrow with a new post and video (provided I can make the time to edit it in the morning!), so I hope to see you then! Have a great Saturday!

Linking up with Five on Friday and Oh Hey Friday!

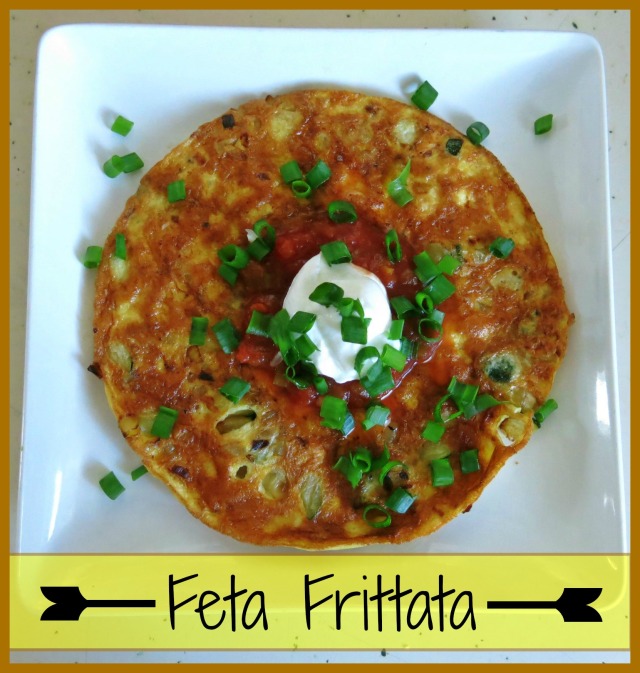
Feta Frittata

Usually around here I focus on posting dinner or dessert recipes, but my go to breakfast lately has been frittatas. I love them! They are so simple to make and a great way to use up any extra veggies you have in the fridge. I’ll keep this post short and sweet (since somehow my posts I had scheduled for earlier this week got deleted!) and get right to it!

Feta Frittata Header

What You Need:
Olive Oil, butter, or non-stick spray to coat the pan with
Garlic, minced
Onion, diced
Zucchini, chopped
Two eggs, beaten with a splash of milk
A handful of feta cheese
Salt and pepper to taste
Sour cream or plain Greek yogurt, as a topping
Salsa, as a topping
Scallions or chives, as a topping

The How To:
This recipe is pretty straight forward.
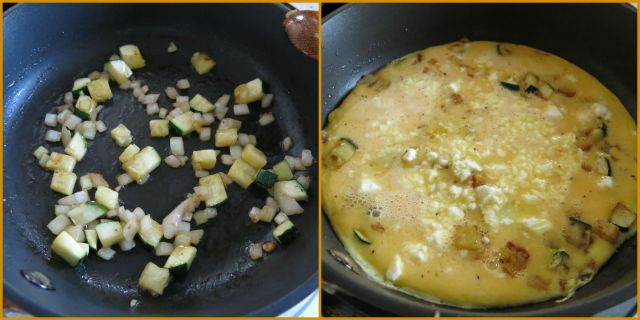
1. Over medium heat, coat the pan with olive oil and saute the garlic until golden brown.
2. Add the onion and zucchini and cook until translucent and slightly softened.
3. Pour the eggs, beaten with a splash of milk, over the vegetables.
4. Allow the eggs to cook for just under a minute and add the feta cheese. Salt and pepper to taste, but be aware that the feta will add a lot of saltiness, so don’t go crazy.

Feta Frittata Step by Step

5. Cook the frittata over medium to medium low heat. You want the eggs to solidify as much as possible before flipping it so you don’t have a huge mess when you turn it over!
6. Flip it and allow the frittata to finish cooking all the way through until it is nicely browned. I love the way the feta browns and gets all crispy and salty. Yum!
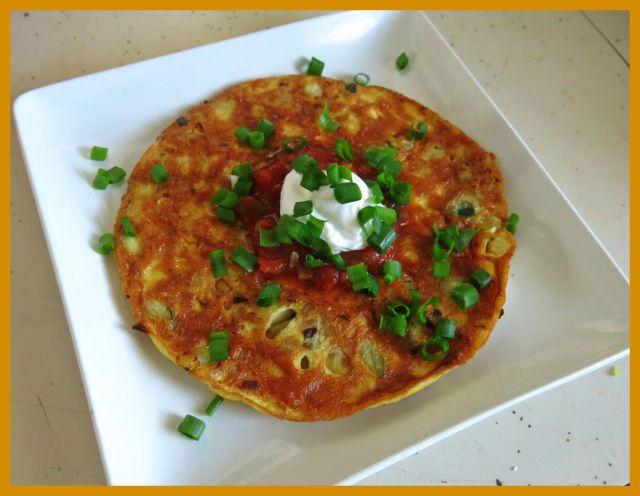
7. When it’s finished cooking, top the frittata with salsa, a dollop of sour cream, and chopped scallions. Enjoy!

Feta Frittata

This recipe (if you can even call it that–it’s so simple!) is incredibly flexible, so substitute whatever veggies or cheese you have on hand or whatever you enjoy most. Serve this with a side of hashbrowns for a delicious breakfast!

Sorry things are a little out of order this week on the blog. I know I usually post my recipes on Tuesdays, but like I mentioned above, I had a little computer glitch. Thanks for your patience!

Linking up with Tuesday’s Table and Lou Lou Girls!

Makeup Favorites

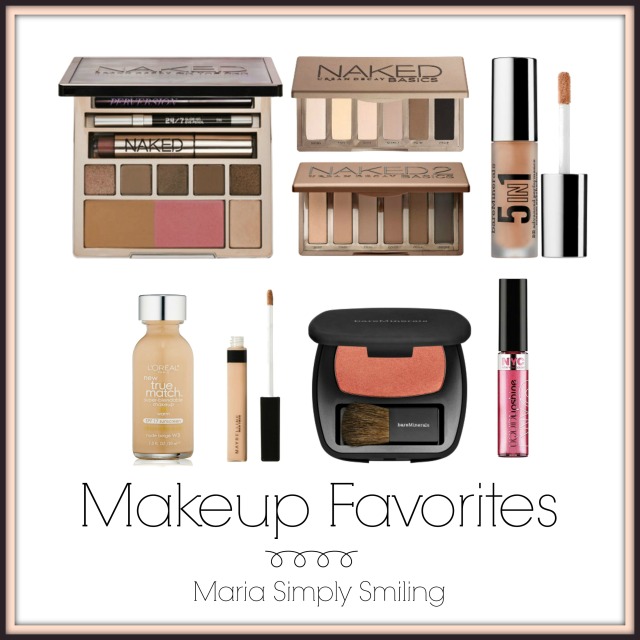
Hi friends! Today I wanted to go ahead and share with you my current makeup favorites. These products are things I use every day (or at least, every day that I actually have time to wear makeup!) and all of these items are things I have (or will) repurchase when I run out. That’s how much I love them! I am still in search of a primer, bronzer, and concealer to call my favorites, so if you have any suggestions for products to try I would love to hear them! Also, my new favorite mascara is the Perversion mascara from Urban Decay, but I didn’t list it separately because it is included in the Naked on the Run palette I’m going to mention. So, let’s get to it!

Makeup Favorites Collage Final

I’m going to go in order of how I apply everything to my face, so things might seem a little backwards from how I ordered things in the picture!

L’oreal True Match Liquid Foundation
I really like this foundation. I have been a big fan of the Revlon Colorstay foundation for a while, but since finding a few new youtubers I’ve been following, I decided to give the L’oreal True Match a try. I’m glad I did! I can get medium to full coverage with this foundation without it looking cakey at all. I love that it has a pretty natural finish to it, and even though I tend to have oily skin I stay reasonably matte all day. This line has a ton of colors to choose from in warm, cool, and neutral shades. It was kind of hard for me to choose my shade, but I ended up settling on W3 and I feel like the color match was a pretty good choice. This has become my new go to foundation!

Maybelline Fit Me Concealer
I intentionally bought this concealer a few shades lighter than my natural skin tone because I didn’t intend on using it as a concealer. I bought the color “light,” and I use it as a highlighter to brighten the area under my eye. I really like the way it blends out easily, and it does work well without being too heavy. I like it enough that I’m considering buying another one in a shade I would normally use for concealer to try it out for its intended purpose.

Bare Minerals Ready Blush
Oh my goodness…this is my favorite blush I have ever used. The color I purchased is called “The Natural High” and it is gorgeous. It is such a beautiful golden peachy color and it brings such a fabulous glow to the face without being overwhelming. I generally don’t like things that have a lot of glitter–looking at the blush you might think it does–but this goes on the cheeks as such a subtle shimmer…oh it’s just so pretty. It really does just make you glow.

NYC Liquid Lipshine
I know I have talked about these before on the blog, and they are back again because they are so fantastic. I own them in about seven shades and I wear them all the time! They have a great color payoff (and color selection) and they don’t feel too sticky on the lips which is really nice. The best part: they are only about two bucks! Hooray NYC!

Bare Minerals 5-in-1 BB Cream Eye Shadow
I first tried this as a sample in the shade Barely Nude and I liked it so much that I literally scraped the bottle clean. I decided to go ahead and purchase a full sized tube, and even though I liked the shade I had sampled I decided to go with a really pretty soft rosy shade called Blushing Pink. This cream eye shadow applies super smoothly and I pretty much use it as a primer for the rest of my eye shadow. Bonus: it doesn’t crease at all! Just a side note though–it is slightly glittery when applied, so if you aren’t a fan of shimmer on the eyes, this may not be for you.

Naked Basics and Naked 2 Basics Palettes 
Love. Love love love love love. I’m a huge fan of matte shadows and I love the nude colors in these palettes. The original palette is more on the warm side and the second palette has more cool colored shadows, but as is expected from Urban Decay these shadows are fantastic. They are super smooth and creamy when applied, and the colors blend so well. I have always had a little trouble making dark black shadows work for me, so I love that the Naked 2 Basics palette has more of a smoky grey color I can play with. I still use the black in the original palette, but I use it as an eye liner instead. I completely recommend both of these palettes to anyone (and I may have even gotten my mother-in-law hooked on them too!)

Naked on the Run Palette
I never would have splurged on this on my own, so thanks, Mom, for getting this for me for Christmas this year! I have used this pretty much every day since opening it on Christmas morning. I love the shadows and the highlight, I love the lip gloss, I love how smooth and creamy the eye liner is, but my favorite thing of all is the mascara. It applies so nicely, doesn’t clump, doesn’t flake, and lengthens and adds volume beautifully. If you want to hear all of my thoughts on this fantastic palette, go ahead and watch my newest YouTube video! It’s a short review and swatches of all of the eye shadow colors so you can see them in real time and not just in a picture. I hope you like it!

Well that’s all for now! What are your favorites that I should try? Let me know!

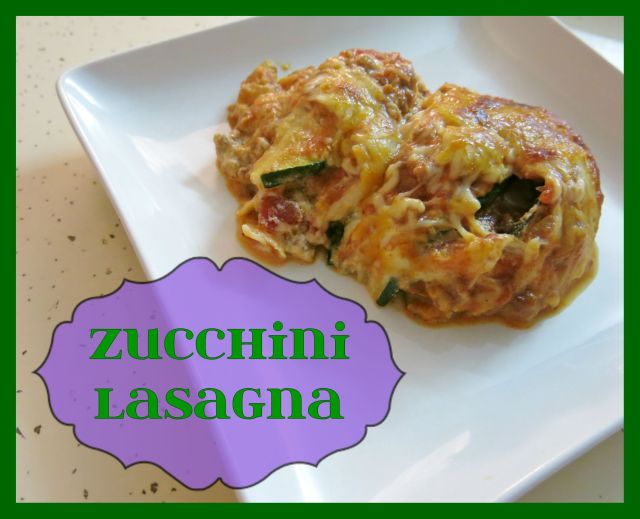
Zucchini Lasagna

If you are a regular reader of my blog I’m sure you have noticed by now that I love zucchini. It’s so healthy, versatile, and it’s relatively inexpensive. This recipe is fantastic because it’s a healthy, veggie packed, low carb lasagna option. Oh, and did I mention it’s delicious? Because it is. It’s so good!

Zucchini Lasagna Header

Since having gestational diabetes during my last pregnancy I’m more aware of my carb intake and always looking for ways I can swap ingredients in recipes for low or lower carb options. The zucchini in this recipe replace regular lasagna noodles so well that I don’t even miss my regular lasagna recipe. It’s also nice to get more veggies in my meal and be able to save my carbs for a yummy, crusty, crunchy piece of bread to sop up the extra sauce. Yum!

Also, don’t be fooled…I know I usually post quick and easy, 30-minutes or less dinner recipes, but this meal is kind of time intensive. It isn’t difficult! It just takes a while to make. Save this for a night when you have plenty of time and are in the mood to cook.

What You Need:
1 lb mild or medium Italian sausage
about 2 teaspoons (3ish cloves) of minced garlic
1/2 onion, diced
2 Tablespoons Italian seasoning
1 28oz can diced tomatoes
1 14 oz can tomato sauce
3 to 4 medium zucchini, sliced longways (about 1/8″ thick)
salt and pepper to taste
15 oz part skim ricotta
1/2 cup shredded Parmesan cheese
1 egg
4 cups shredded mozzarella cheese

The How To:
Preheat your oven to 375°F.
1. If the sausage has casing, remove it and begin to cook over medium high heat until the sausage is cooked through and there is no pink left. *Note* If you want to keep this recipe strictly vegetarian you can replace the sausage with diced portabella mushrooms, but be sure to drain the excess liquid so the lasagna doesn’t become watery.
2. Once the sausage is cooked through, drain the excess fat until there is only about a tablespoon left. If you would like to remove the sausage from the pan you can, but I like less clean up, so I left the sausage in the pan for the next step.
3. Saute the garlic until lightly browned and then add the onions. Stir all together and cook until the onions are somewhat translucent.
4. Once the onions are translucent, add the sausage back to the pan if you removed it, and then add the diced tomatoes as well as the tomato sauce and Italian seasoning. If you purchased tomatoes and tomato sauce already with Italian seasoning, you can leave out the extra seasoning according to your preferred taste. Allow the sauce to simmer over medium low heat while you prepare the zucchini.
Zucchini Lasagna Sauce

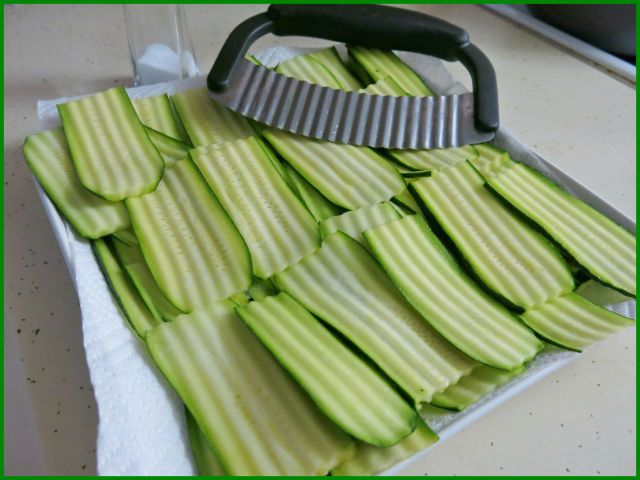
5. Slice the zucchini longways so that they are about 1/8″ thick. Your life will be one thousand times more simple if you have a mendolin slicer, but I did not, so I cut my zucchini in half and used my wavy slicer (does that have an actual name?). The goal is to make the slices thick enough that they don’t just disintegrate into mush, but thin enough that they will cook all the way through and act like noodles. It can be tricky, I know. Don’t worry. You’re doing great!
Sliced Zucchini

6. Lightly salt the zucchini slices as you go. This will not only season the zucchini but will also help the excess water come out. I put my slices on a bed of paper towels and then soaked up the excess water by gently pressing the slices.
7. Brown the zucchini in a pan. If you cook the slices before putting them in the lasagna, most of the excess water will be cooked off beforehand. This makes a much more delicious (and significantly less soupy) dinner. Trust me. I know it seems like a time consuming step, but it really does make it worth it. You can also add pepper at this point, if you prefer.
8. Once your zucchini slices have all been cooked off, mix the ricotta, Parmesan, and egg together in a bowl until well blended. Ta-da! You are ready to layer!
9. Start with a layer of sauce at the bottom of your baking dish or disposable pan (hello easy clean up!). Follow with zucchini slices, then a thin layer of the ricotta mixture, and then some mozzarella cheese. Continue to layer until you run out of ingredients. My lasagna usually consists of sauce, zucchini, ricotta, mozzarella, sauce, zucchini, ricotta, sauce, and mozzarella to top it off. Also, sorry! I forgot to take a picture of my ricotta layer. But I’m sure you get the idea.
Zucchini Lasagna Layers

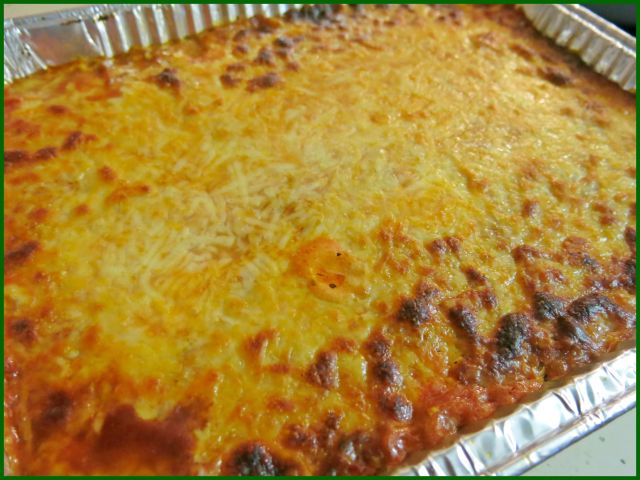
10. Cover your baking dish in tinfoil and then bake at 375°F for 45 minutes, then bump the temperature up to 400°F and bake uncovered for another 10-15 minutes until the mozzarella on top is browned and bubbly to your liking.
Baked Zucchini Lasagna

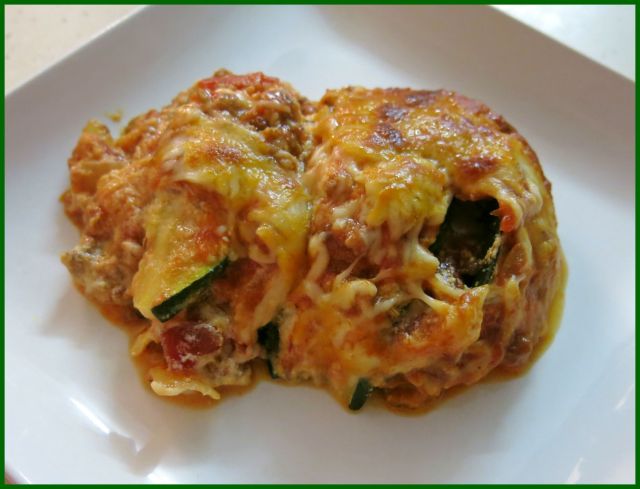
Enjoy! You will probably want to dig in right away, but if you have the time to allow it to rest for about 10 minutes, you may come out with a slightly more structured slice of lasagna than I did. Ha, I didn’t want to wait–I was starving!

Plated Zucchini Lasagna

Also, don’t you worry if it kind of falls apart. It may not look like the most amazing thing you have ever cooked, but I can promise it will be among the most delicious! I hope you love it! Let me know if you try it out or if you have any questions.

Happy cooking!

Linking up with Tuesday’s Table and Lou Lou Girls!

The Silver Lining

Hi friends! This week has been kind of crazy. Regardless of getting myself organized at the beginning of the week I feel like everything has just gotten away from me and I am struggling to keep up! Does anyone else every feel like that? I did miss my promised post on my wardrobe basics (I’m sorry!) but I have a little boy who has decided to only take one nap daily instead of two, and a short one at that. It has totally thrown me off! I’m pushing that post back to next week or the week after, just to give me some more time to put my wardrobe together and to get used to my new daily schedule (I miss Evan’s two naps!!!)

Anyway, let’s look on the bright side of things that happened this week, shall we?

Silver Lining Header

Extra sleep // On Tuesday morning both Brinton and I were supposed to wake up at 6 AM so he could be ready for me to drop him off at work by 7 and so that I could get ready for work too. On Tuesdays after I drop him off I come back home, make Evan breakfast, get his bag together, and then head to work by 8am. Well, Brinton’s alarm never went off and I woke suddenly at 6:46 AM and we kind of freaked out. I don’t know how we did it, but we both made it work on time, Evan was still fed, and on the bright side, we got about 45 minutes of extra (and apparently much needed) sleep.

Independent Play // I don’t know why, but for the last few mornings I have been waking up okay, but I am completely exhausted barely an hour later. It has made it not only really hard to get anything done in the mornings, but super hard to play with Evan like I should be doing! It makes me feel not only exhausted, but guilty too! Even this morning, I just laid down on the couch and kept drifting off as he played. The silver lining? Evan has been awesome about having independent play in the mornings, and I haven’t had to worry about if he is still having fun. He lets me know when he needs me or wants me to play with him or read to him, but otherwise he has been totally cool about letting mom get a few more minutes of rest.

Getting my butt kicked // This week I started Jillian Michaels Ripped in 30 week 2 and the first day completely kicked my butt. On the bright side though I have been working out for at least 30 minutes every day since the day after Christmas! Today is day 15 and I feel great. I’ve been alternating the Ripped in 30 work out with yoga and pilates, and next week I am going to try to find ways to incorporate more cardio as well. To be completely honest I don’t usually stick with working out this consistently and I certainly have never managed to stay committed to doing something every single day, so I am really proud of myself for getting past two weeks. I am excited to keep it up and start seeing changes in how I look, too!

Gas is $3.28/gallon // Ha! That IS the silver lining! That is the lowest it has been here in Honolulu since we moved here 3 and a half years ago. I’m sure to the rest of the country right now that seems crazy high, but I’m excited!

AdobePhotoshopExpress_6cf2f4caf8fb42c589b782917d3fd1dd

Taking down Christmas // Yes, we still had Christmas decorations up until today. I know, I know. But we seriously had nothing decorating our walls before Christmas and I didn’t want to take everything down and feel sad! The bright side though is that I have been doodling and brainstorming and have come up with the next piece of art that I want to create to hang in the den. We never decorated this apartment because it’s kind of old and sad, and we were hoping we wouldn’t be here for very long…but we have lived here almost two and a half years now and I need some stuff up on the walls. It’s time!

Thanks for being patient with me as I play catch up. I know I’m always playing catch up, and I really intended to not have to do that this year, but Evan’s nap schedule changing really has thrown off my daily schedule. Now that it has been a week and I know more what I can expect from him I think I can work on getting ahead of the game again.

Happy weekend!

Linking up with Five on Friday and Oh Hey Friday!

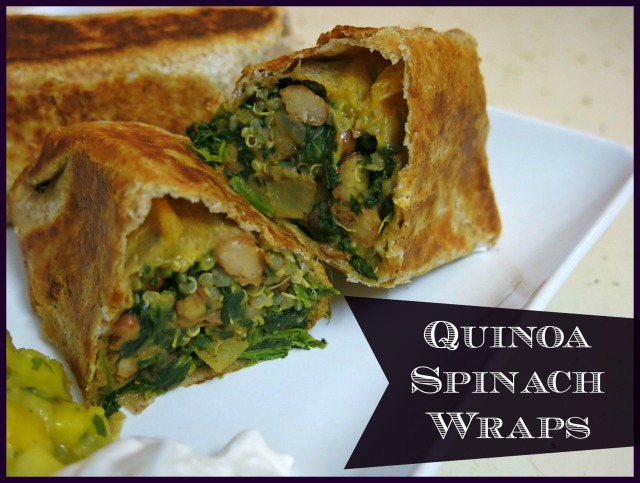
Quinoa Spinach Wraps

Something I loved about having my in-laws in town at the end of last year is that I got to enjoy two weeks of my mother-in-law’s yummy cooking. She is definitely more focused on healthy eating than I am, which makes this the perfect time to add some new recipes to my collection that not only taste great but are actually good for me too. I have my usual go-to favorites, but it’s always so nice to revamp the same old recipes every now and then to add some variety! She made these delicious quinoa spinach wraps for us for dinner while she was here, and was generous enough to allow me to share the recipe here with you all!

Quinoa Spinach Wraps Header

Look at these wraps. Oh my goodness. So good. I know you’re going to love them as much as we do.

What You Need:
1 1/2 cups quinoa, rinsed
2 tablespoons olive oil
1 small onion, chopped
kosher salt and black pepper
2 teaspoons chili powder
2 15.5-ounce cans pinto or black beans, rinsed
3/4 cup low-sodium vegetable or chicken broth
2 cloves garlic, chopped
2 10-ounce packages frozen chopped spinach, thawed and squeezed of excess liquid
16 average sized tortillas or wraps (if you want to get fancy, see my homemade tortilla recipe here)
12 ounces sharp cheddar, grated (about 3 cups)
salsa, sour cream, and sliced avocado, for serving

The How To:
1. Cook the quinoa according to the package directions. Meanwhile, heat the oil in a large skillet over medium heat.

2. Add the garlic and onion. Cook until the garlic is browned and the onions are softened, 3 to 5 minutes. Add the chili powder, salt and pepper to taste, and cook, stirring until fragrant, about 1 minute.

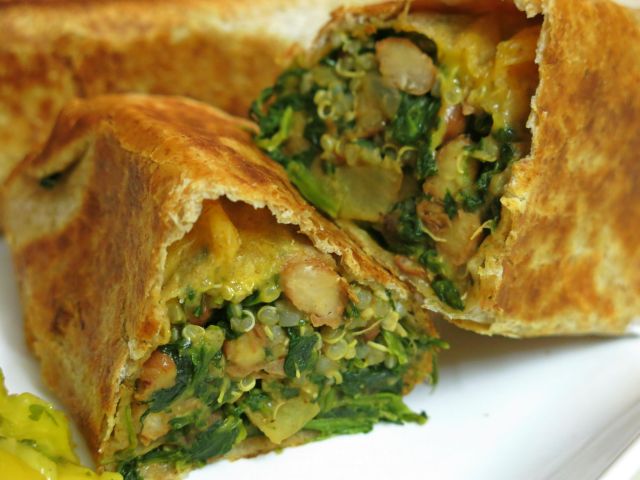
3. Add the beans and broth. Simmer, stirring occasionally, until most of the liquid has been absorbed, 2 to 4 minutes more. Fold in the spinach and the quinoa.

4. Layer the tortillas with the cheddar cheese, followed by the quinoa, spinach, and bean mixture, and top again with more cheddar.

5. Roll them up into burritos. Once they are rolled, heat a tiny bit of oil or nonstick spray over medium to medium high heat, and brown off all sides so the burritos become delicious and crispy.

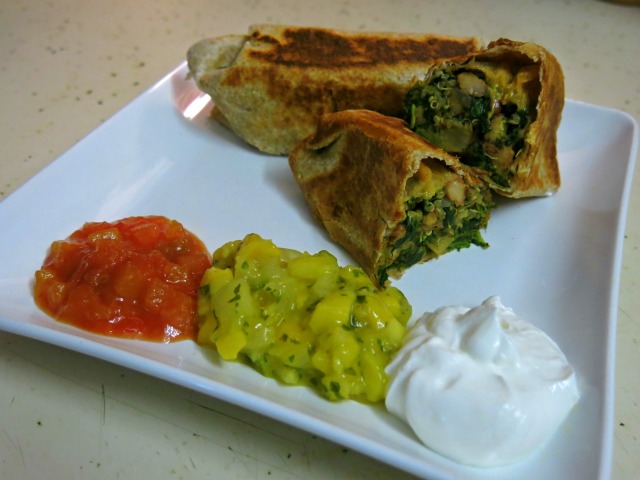
6. You’re done! Serve them with salsa, sour cream, and avocado. Delicious!

Quinoa Spinach Wraps Close Up

Tip #1: Some tortillas or wraps roll up more easily when warmed. You can heat one at a time in a dry skillet over medium heat for a few seconds until pliable, or heat several at a time between two pieces of damp paper towels in the microwave on high for about 10 seconds.

Tip #2: You can use regular sized tortillas, or fajita sized if you want the recipe to go a little further. The serving size when using a regular sized tortilla would be one burrito, while the serving size when using the smaller tortillas would be two burritos.

Quinoa Spinach Wraps Plate

Something I absolutely love about this recipe is that you can wrap each little burrito individually in tinfoil (before making them crispy!) and then freeze them for quick and easy meals. My mother-in-law says she will just grab one or two out of the freezer when she needs a quick dinner, unwrap it from the tinfoil, and heat it in the microwave for a minute or two, just until the middle isn’t frozen anymore. You can eat it just like that, or heat it in a pan like you normally would for some extra crispiness. Quick, easy, delicious, filling, and pretty darn healthy. Um, yum.

Let me know if you try the recipe! I love to see and hear about how you make it yours. Happy eating!

Linking up with Tuesday’s Table and Lou Lou Girls!

Building a Simplified Wardrobe You Love to Wear

For the past few weeks I have felt the need to purge as much clutter from my house as possible, including from inside my closet. I was feeling really overwhelmed with all my clothes and still feeling like I had nothing to wear, so I decided to shop my own closet and simplify things. I mean for goodness sake, I turn twenty-six at the end of the month and I still have clothes from high school. It’s time to move on!
Building a Simplified Wardrobe you Love to Wear Header

I was intimidated to start this process because I love clothes. I love love love them. Accessories too. But, I’m at this point in my life where I have neither the means nor the space to be able to support the kind of endless wardrobe that I dream of. I have the feeling that eliminating the bulk of clothes I don’t wear that are just taking up space will be freeing. Maybe I’ll even find that my dream wardrobe isn’t endless after all, but simple and minimal.

You could call this a capsule wardrobe of sorts, but I haven’t gone through yet to see how many pieces I have now that I have paired things down and I don’t think everything goes with absolutely everything. Can I still call it a capsule wardrobe? I don’t know. Regardless of what I’m calling it, I already feel SO much better about my clothes and about my body because I always feel good in what I wear. I’ll go more in depth in a separate post about what specific pieces I have kept and how I plan on mixing and matching them, but for now I wanted to tell you how I started the whole process because let’s face it–sometimes it is hard to get started, and even harder to let things go.

Take everything out of your closet // Seriously, everything. Clothes, shoes, your bath robe, belts, scarves, extra hangers, that purse that you forgot you had because it got stuffed all the way in the back. Everything. Lay it all out on your bed or the floor–where ever you have space. If you use a dresser or drawers, empty those too. You want your entire wardrobe to be out in the open, in plain sight, so that nothing can hide from you.

Stop for a moment // Breathe. Don’t get overwhelmed. You good? Okay. Continue.

Find your favorites // You know what I’m talking about. That shirt that makes you feel like a million bucks, or that dress that you get compliments on all the time. Quickly go through and pick out the things that make you feel great, look great, and that you love. If you have even a moment of doubt about whether or not you love it–YOU DON’T! Put it down, and we will get to it in a minute. You may find that when you are finished with this step you have only a few things hanging in your closet, and that’s okay! This is your foundation, and we are going to build up from here. If you end up with more than half of your stuff back in the closet or on the shelves, that’s okay too–but make sure you really are only choosing pieces you LOVE.

Begin to sort // Now that you have all of your faves hanging back up, it’s time to go through the pile again. For this part, move quickly. Don’t stop to think too much, otherwise you will talk yourself into keeping way more than you need to. Be instinctual. Remember, just because something is pretty, or was purchased on sale, or cost a fortune, or was a gift DOESN’T MEAN that you have to keep it. Some of your clothes have made it through a lot of legs of the race, but sadly, some players must be eliminated and cannot continue on. Sorry, I’ve been watching a lot of reruns of the amazing race on Hulu-plus. Anyway…

Go through your clothes and sort them into three piles: to donate, to try on, and needs to be fixed. In your donate pile go the clothes that you know you never wear, or hate wearing, or always try to avoid. Don’t think twice. Just do it. Your try on pile should be for clothes that you are kind of neutral toward. I had quite a few tops that were in fine condition that I liked and looked good on me, but that I wasn’t completely in love with. After trying them on, I decided to keep them for now because they were able to match many other items in my wardrobe, and I can’t exactly afford to get rid of everything I own right now. Remember though, if you have to say, “I like this, but…” or, “This would look nice, if…” you probably need to get rid of it, unless it is a super easy thing to take care of. Lastly, in your needs to be fixed pile should be the clothes that have a small stain you need to try to remove, or those pants that need to be hemmed, etc. If you feel confident that you are actually going to follow through on these fixes, alterations, or DIY attempts, then go for it and keep them; but if you know you are never going to get around to taking care of things, into the donate pile they should go.

Do this sorting step with everything you have. At the end of sorting, hang up everything you are going to keep, and move the pile to be donated to a different room. If you feel so inclined, you can go through your accessories, including shoes, purses, jewelry, and belts at this point too. If you really want to go through everything, take care of your work out clothes or pjs now as well, and any other miscellaneous items. It should be noted that I am not counting accessories or work out gear toward my total item count, nor am I counting my t-shirts or pants I use for working at volunteer projects, moving, painting, etc. I also live in Hawaii and don’t have to worry about seasons, so if you have items you love that aren’t seasonal (including outerwear!) don’t get rid of them! This is where the “capsule” part of the wardrobe can come into play. You can either separate by season and then store those clothes elsewhere, or you can just move them to a separate part of your closet if you are low on storage space.

One more side note: If you are someone who has a really hard time parting with clothes (I know I am…) because you are afraid to get rid of something that you “might need if such-and-such occasion ever happened,” consider putting those clothes into storage for a month or two. If you go to retrieve something out of the box, you can keep it. But at the end of the time period you gave yourself, anything that hasn’t been touched should be donated. Chances are you’ll forget you even had it in the first place.

Find the missing pieces // Now that you have paired down your wardrobe, look at your closet! Doesn’t that feel so much better? If you don’t have too much hanging up still, don’t be alarmed! Based on the pieces you have kept–which should all be pieces that you LOVE and feel good in–you should be able to see your style start to emerge. Now you can begin to make a shopping list of pieces you need. Only left with one pair of pants? Need a new pair of classic black heels? Write down the items you need to fill holes, and then prioritize your needs so you know what you need to buy first. This will allow you to be able to shop sales when possible, and honestly makes shopping way less stressful. I went shopping today, and even though I saw some things I really loved, I kept my wardrobe in mind and knew if a particular item didn’t really fit in. I was able to be way more decisive, and my wallet was grateful too!

As for what ended up in my closet–I was so surprised to see that even though I love color, I naturally gravitate toward neutrals. The few pops of color in my closet were all in the same coral/pink shade range, except for a few dresses that I have which helped mix things up a little bit. When I saw my closet after it was all cleaned out, I decided that I want to primarily build my wardrobe using neutrals and spice things up with pops of color by accessorizing. I think this will allow my clothes to mix and match really easily and will give me way more combination options than if I have tons of colorful tops and bottoms. I still will have a few colorful pieces! But in the future when I am purchasing things I am going to be more aware of the color palette I’m going for.

There you have it! Sorry if that was kind of long winded, but I wanted to be thorough. What do you all think? Are you going to try to simplify things and revamp your wardrobe? Do you have any other tips I should know about? Let me know in the comments!

Don’t forget to be on the lookout next week for my follow up post where I’ll go in detail (with pictures!) about what my wardrobe looks like now that it has been made over.

I hope this was helpful. Have a great rest of your weekend, loves!